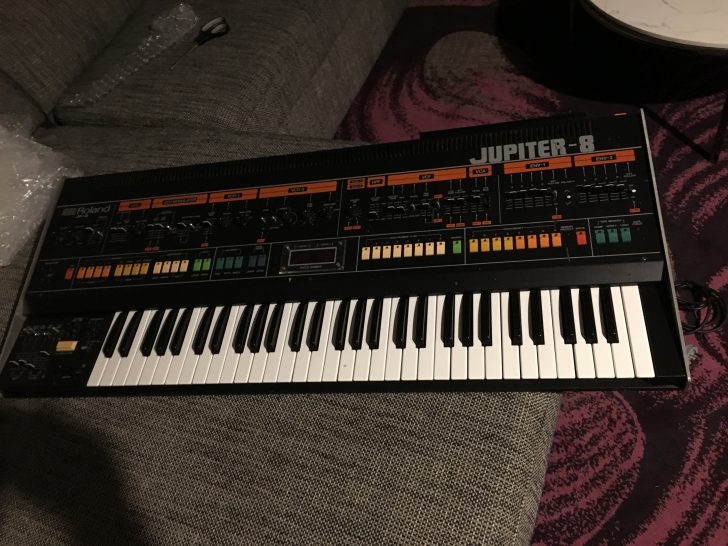
Reader Darren Glen let us know that he’s launched a website to document his restoration of a non-working and rusted Roland Jupiter 8.
“i have been documenting every step,” he notes. ” I share a lot of tips and tricks on how i am fixing it and i am sure it will help many with a similar problem!”
The story starts with a 1500km trip to pickup the knackered beast, and Glen’s first impressions:
She had issues, as I expected without even needing to plug her in. All the original knobs were gone. The side cheeks were bashed and chunks missing like a Rottweiler had chewed on them. The infamous rear “steak grill” heatsink had taken some hits.
This old girl had been touring on the road at some stage .. HARD.
Plus there was the rust … so much rust.
Maybe someone else might have relegated her to the spare parts graveyard just looking at her. But I was here to rescue her and bring her back to life!
The site covers topics that aren’t specific to the Jupiter 8, including replacing fried components and how to whiten yellowed plastic parts.

Wow, a great read, of course i binged my way through all the posts so far and now i want more! Totally worth the read even if you have no feels for the Jupiter 8.
Well written and fun to read. Kind of a Jupiter 8 horror story: Don’t look behind that panel!! Ahhh! More rust! But this Jup 8 seems to be in good hands and it’s fun to see the progress. Can’t wait for more.
For the discolored keys the author might consider “Retr0bright”. I’ve had good luck on old computer cases with it. http://www.retr0bright.com/ Recipe link is at the top.
Great read!
Very nice! Was fun to read and the pictures are good. It’s great to see someone resurrecting such a beast.
That was a great story. It was an incredible amount of work and the author has an outstanding knowledge of electronics and synthesizers! I have owned 3 Jupiter 8’s and have never had to do anything to them other than change the battery, lucky me! Each time I sold my Jupiter 8 I truly regretted it within about a year and found myself searching again, only to find, as expected the price had climbed another 10 or 20%. The first one I purchased was a 12bit version back in 2001 for 2000.00. The 2nd one I traded my Jupiter 4 and JX10 in on with some cash which landed me the JP8 with midi for around 3,500.00 total with the value of what I had in the two other synths. That one was the 5th Jupiter 8 produced and sold it for 9,500.00 in 2014 I believe. In late 2015 I purchased my first 14bit for $7,500.00 but spent about 400.00 adding midi. Anyway, it’s not fun chasing the upward price slope of a JP8 but I can tell you, they are worth it. I have owned a ton of the iconic analog synths and nothing has satisfied me more than the Jupiter 8. Loved this story!
thank you all for your awsome comments! theres so few detailed teardown pics of inside a Jupiter 8 out there, it seems the guys who know the tips on how to do it and fix inside keep it hush hush like a little trade secret i hope everyone who owns a Jupiter 8 benefits from the blog somehow!
Great work… amazing. Here are photos of the inside of mine if ever needed….
https://www.youtube.com/watch?v=g50573SPswo
This is really cool. Nice coverage of a long restoration project and I look forward to future posts.